

When it comes to setting up the Android emulator on a computer, most online tutorials start with "Download Android Studio." Subsequent steps explain how to use the interface to pick the API and device profile before finally creating the AVD.
Point and click solutions often work well for the visual user or in cases where a one-time setup is all that is necessary to bootstrap a configuration for later use. Unfortunately, running UI tests on a CI or setting up a host of CIs for your team’s use, caters neither to the visual user nor to the prospect of doing something just once. Herein lies the crux of our problem. Thus, the lazy engineer asks, “is there a way to do this only once?”
As you would probably expect, the answer is yes.
Pitfalls to a Clean Setup
In most cases, downloading a few tools in the command-line and unzipping them for use is a pretty trivial task. However, setting up Android emulators is a different beast altogether. Let’s examine a few cases where the setup isn’t so straightforward.
Google Chrome
If your automated testing is ever likely to use or open Google Chrome, you’ll have to get past what Google calls its First Run Experience. On most consumers’ phones, users would follow the prompts by accepting the licensing and signing in. This interruption is, of course, unacceptable to an automated test and must be disabled.
Android Disambiguators
One typical example is the URL disambiguator. This occurrence seems more common on older APIs (such as 27 and lower), which shipped with an application called the Webview Shell. In this case, since both the Webview and Google Chrome handle the `http://` protocol, the system brings up the disambiguation prompt when any link is clicked for the first time, interrupting the automated tests. Users and testers alike tend to prefer its more common sibling, Google Chrome.

Even though this example uses URL disambiguations, the solution to this problem is quite generalized and applies to any of these prompts.
Gboard
As with Google Chrome, Gboard, the default keyboard which ships with Android, also has a similar First Run Experience. This prompt prevents any keystroke interaction with the keyboard until the information is acknowledged.
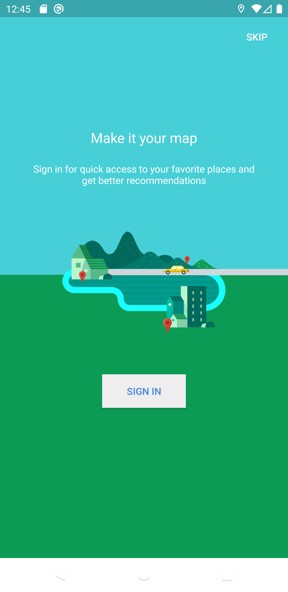
Google Maps
As with Google Chrome, there is also a First Run Experience on Google Maps. If you plan on using this app, it is also prudent to skip this introductory flow so that a test can jump right into using the maps.
These very separate, but common issues require individual attention before an emulator is "clean" and can accept tests without undue interruption.
Setting up the Host
Part of our journey begins with setting up the necessary tools on the physical device itself, whether it be a CI or your development machine.
Obtain the Command Line Tools
The very first step is a simple download and extract operation. The most recent version of the Command Line Tools is available at the bottom of the Android Studio download page. This script uses a regular expression to find that link and automatically download the associated ZIP package.
Once the script downloads the ZIP file from Google, it extracts the package and places it under a dedicated folder in your user directory.
Install Java
Of course, all Android projects require Java. Thankfully, our friends at SDKMan have made the installation of this tool quite easy. We need JDK 8 since Android does not fully support versions more recent than that. Let’s install SDKMan and use that tool to install Java.
Like the previous code sample, the script uses some context to deduce the latest version of the JDK 8 from AdoptOpenJDK before installing it. SDKMan takes care of setting up the necessary environment variables, such as `JAVA_HOME`, so we do not need to worry about any additional steps.
Install the Android SDK
Before automating the install of the Android SDK and its related tools, we need to set up the `PATH` and `ANDROID_HOME` environment variables. Since the installation location of these tools is managed entirely by the scripts, we can make these modifications ahead of time, knowing that a later step installs the software into the desired directories.
Next, we need to install this script somewhere so that it runs each time a terminal opens.
Last, now that we have access to the necessary software in the shell, we can obtain all of the development tools.
Setting up the Emulator
The next part of our journey now moves to the emulator. With all of the necessary tools available on the host, we can install the Android emulator and configure it.
Create the AVD
Let’s begin by obtaining the AVD image and using it to create the emulator.
You may choose to carry out the next few steps in a variety of ways. For example, consider:
- Wiping the device to a clean state on each use. In this scenario, everything is reset to its factory defaults, requiring each of the following "fixes" to run every time. You may find it helpful to add the subsequent solutions to your build and testing process to ensure the emulator is ready to use after each launch.
- Setting up the device to the desired state, then never erasing it. This scenario more closely emulates how a real user would interact with his or her device. If you choose this approach, you would only need the subsequent scripts to run once when you initially set up the emulator, saving you precious time during each build.
At this point, the subsequent steps assume you have already started up the emulator and have it ready to go.
Fix Google Chrome
For development purposes, Google provides a way to bypass the First Run Experience. Although it is not exactly obvious, an engineer can place a file on the device which contains a series of flags instructing Chrome to bypass the welcome prompt, as if the user had already signed in.
Fix the HTTP Android Disambiguator
Although this fix only applies to APIs 27 and lower, the general concept for all of Android’s ambiguous protocol handlers remains the same. In this case, the culprit is the Webview Shell sharing the `http://` protocol with Google Chrome. Since the shell is a system-default application, it takes a bit of muscle (aka administrator privileges) to disable it.
Fix Gboard
Unfortunately, there seems to be no reliable way to dismiss all of the prompts when using Gboard for the first time. In that case, we can install an alternative keyboard that does not have any onboarding flow and set it to be the preferred keyboard. The Android SDK’s example Soft Keyboard is an excellent replacement for the built-in keyboard.
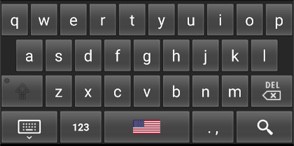
It’s not pretty, but it is functional and doesn’t have the legal prompt on the first run. Unfortunately, this keyboard no longer ships with AVD images targeting API 28 and above. For this purpose, we have resurrected this program so that we can install it on any device, even on ones that do not ship with it.
Head over to our project on GitHub and click on the releases tab to obtain a precompiled APK. With the binary in hand, let’s push it to the emulator and switch the default input method.
Fix Google Maps
The onboarding experience for Google Maps isn’t very intrusive. All a user needs to do is open the app, hit the back button to dismiss the prompt, and Google doesn’t bother showing it again. A series of ADB commands can simulate this action.
Conclusion
Now that I have shown you the nitty-gritty details to the solutions for these emulator bootstrapping problems, I hope you didn’t think I’d leave you hanging without putting a bow on all of this.
At UPMC Enterprises, we face these issues regularly and have open-sourced our solutions to them. Feel free to check out our repository, download the scripts, and try them out in a neatly packaged bundle. Keep in mind that it is optimized to work within a Mac environment, but should (could) also work on *nix systems, as well. Also, don’t forget its sister project, the Soft Keyboard, should you need it.
Farewell for now, and Godspeed to your emulator setups. 🏎
.svg)


 DR Android


